Wednesday, October 13th, 2010
A while back, there was a blackout in my area during dinner time. I didn't want to open my refrigerator because I didn't know how long the blackout was going to last, and I couldn't go out for dinner because my garage door wouldn't open without electricity. I tried walking to the closest restaurant but it seemed like everything within miles was closed due to the blackout. I decided to go into survival mode and decided to make stove top rice and eat packaged curry with it. I have a gas stove so all I needed was a candle to start the flame.
I wanted to update this post because I found that covering the hole on the top of the clay pot helped to keep the rice moist. If you're using a steel pot or other types of lids without a hole in it, then you're ok but since I used a clay pot in the original post, I wanted to update it with this change.
I also found that using a thin cotton cloth to line the edge of the pot will help to prevent steam from escaping during the cooking stage. This is helpful when you're using a lid that isn't very heavy or if your lid doesn't match your pot.
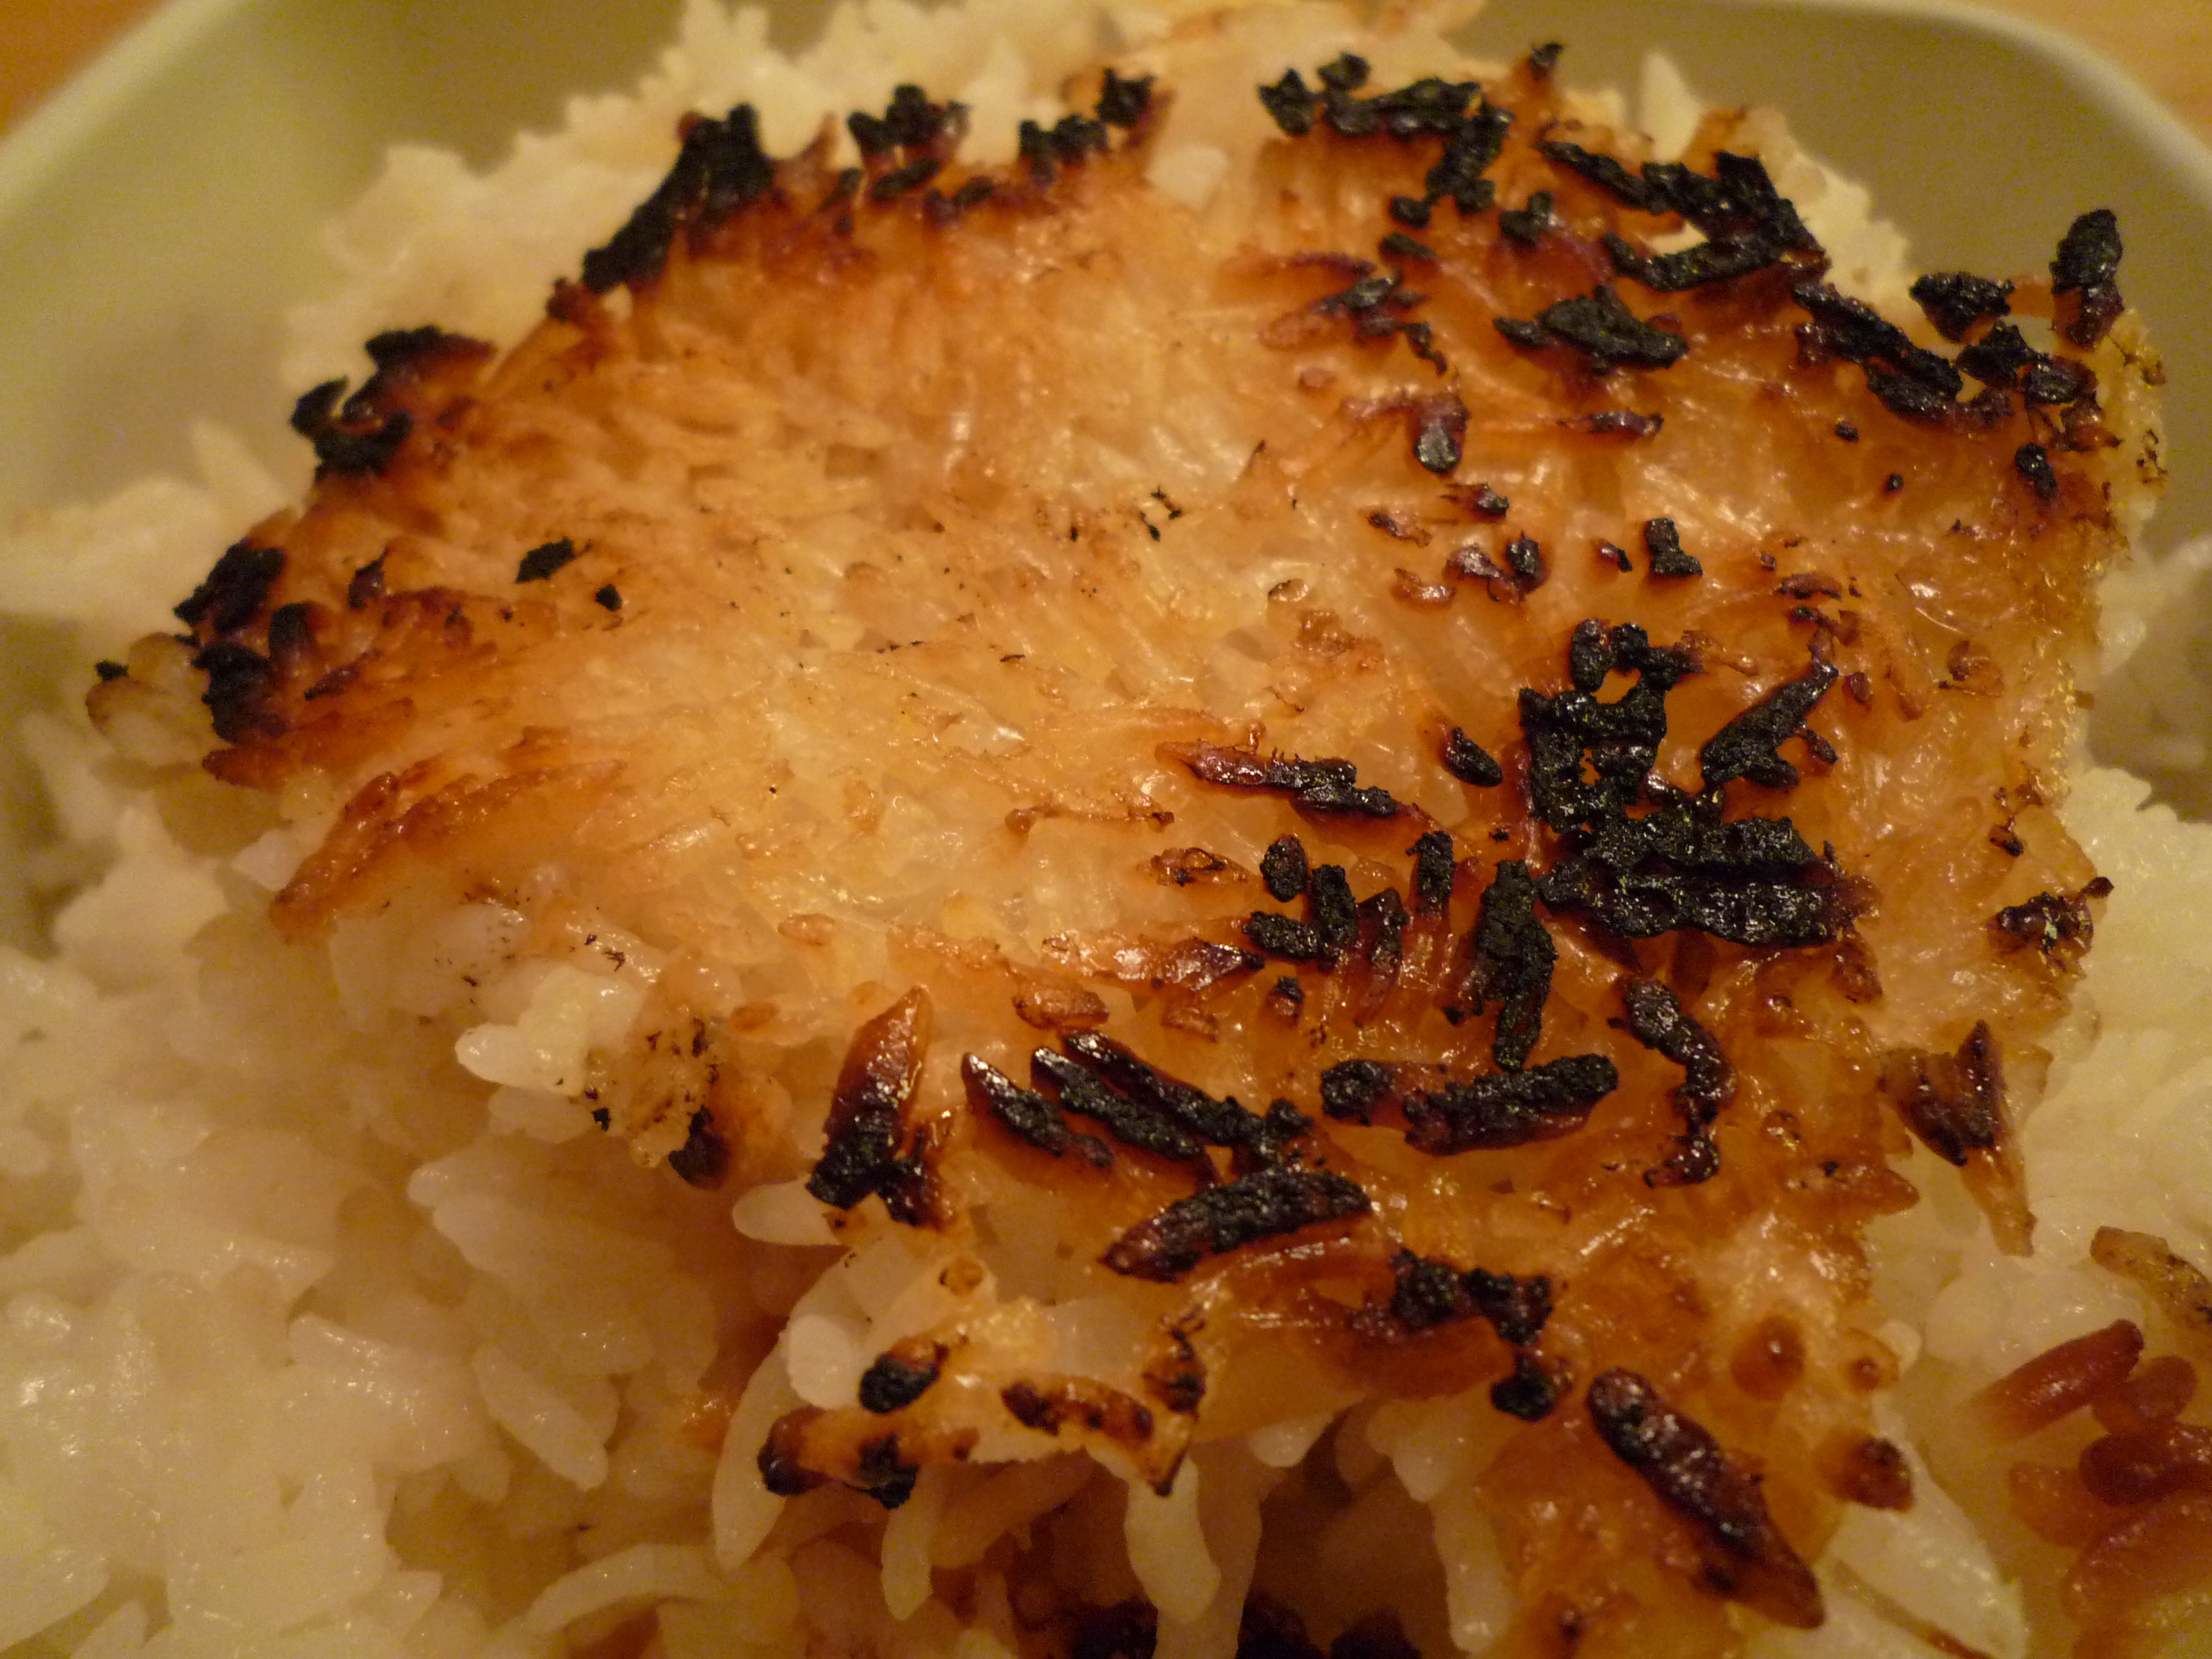
The benefit to cooking stove top rice is that you get more flavor coming out of the rice, especially if there is toasted okoge (toasted rice) at the bottom of the pot. The con is that more often than not the rice will come out dry and controlling the heat is difficult, but once you make it a few times, you should be able to figure out the perfect temperature for your pot/pan.
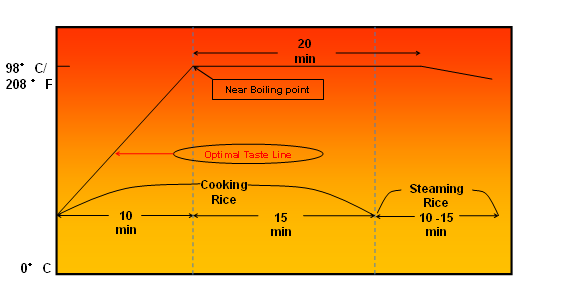
There is a science to cooking rice and I'll try to explain it using a graph. You should note that controlling the heat is the most difficult part of cooking stove top rice. Please refer to the size and pot chart for additional tips.
Ingredients
2+(1/4) cups of Japanese medium grain rice (this is equivalent to 3 cups in Japanese units
2+(1/4) cups of purified water*
Pot or pan (see pot chart)
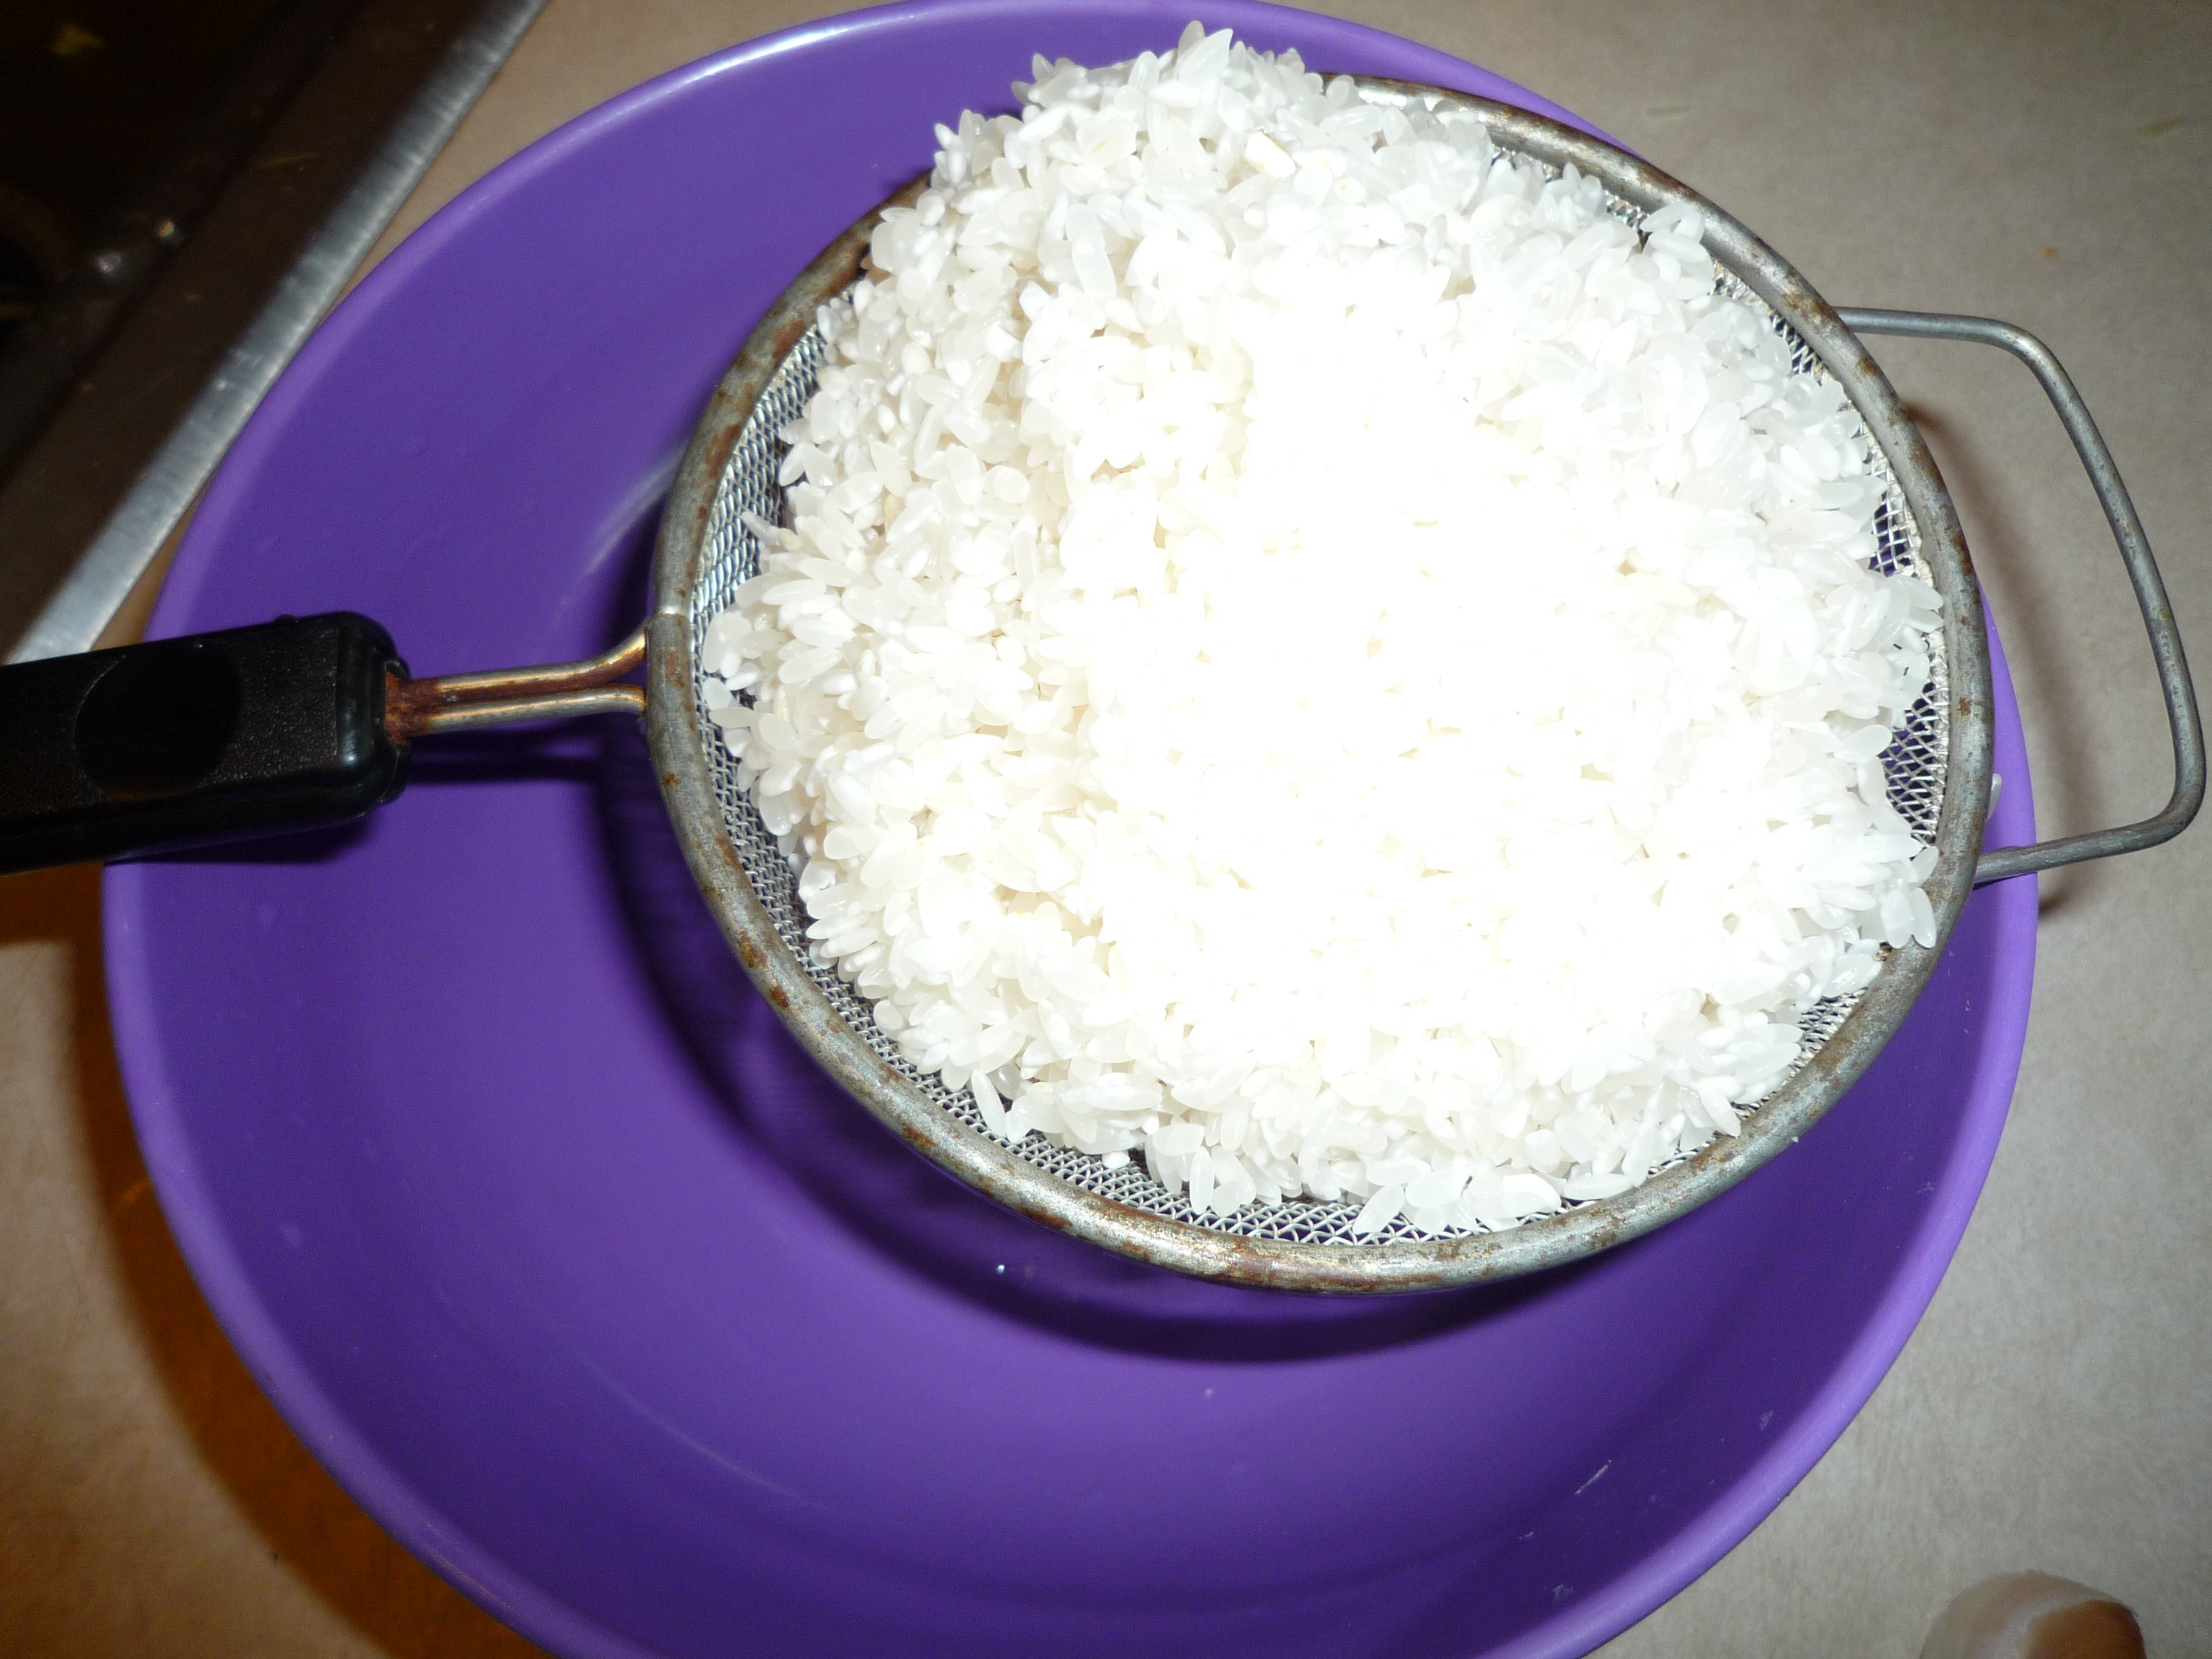
1) Wash rice according to the cooking with an
electric rice cooker directions. Drain water with a colander.
2) Add the rice and purified water to the pot and soak for at least 30 minutes. (During the summer or warm climates 30 minutes, during the winter or dry or cold climates 1 hour).
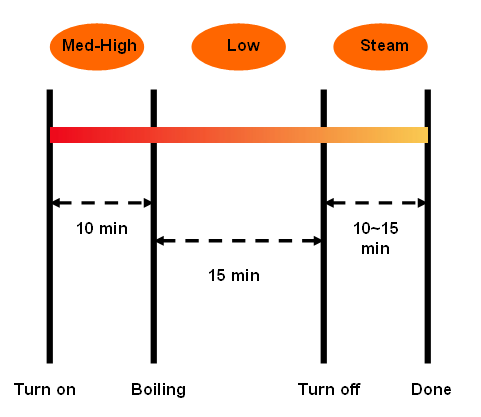
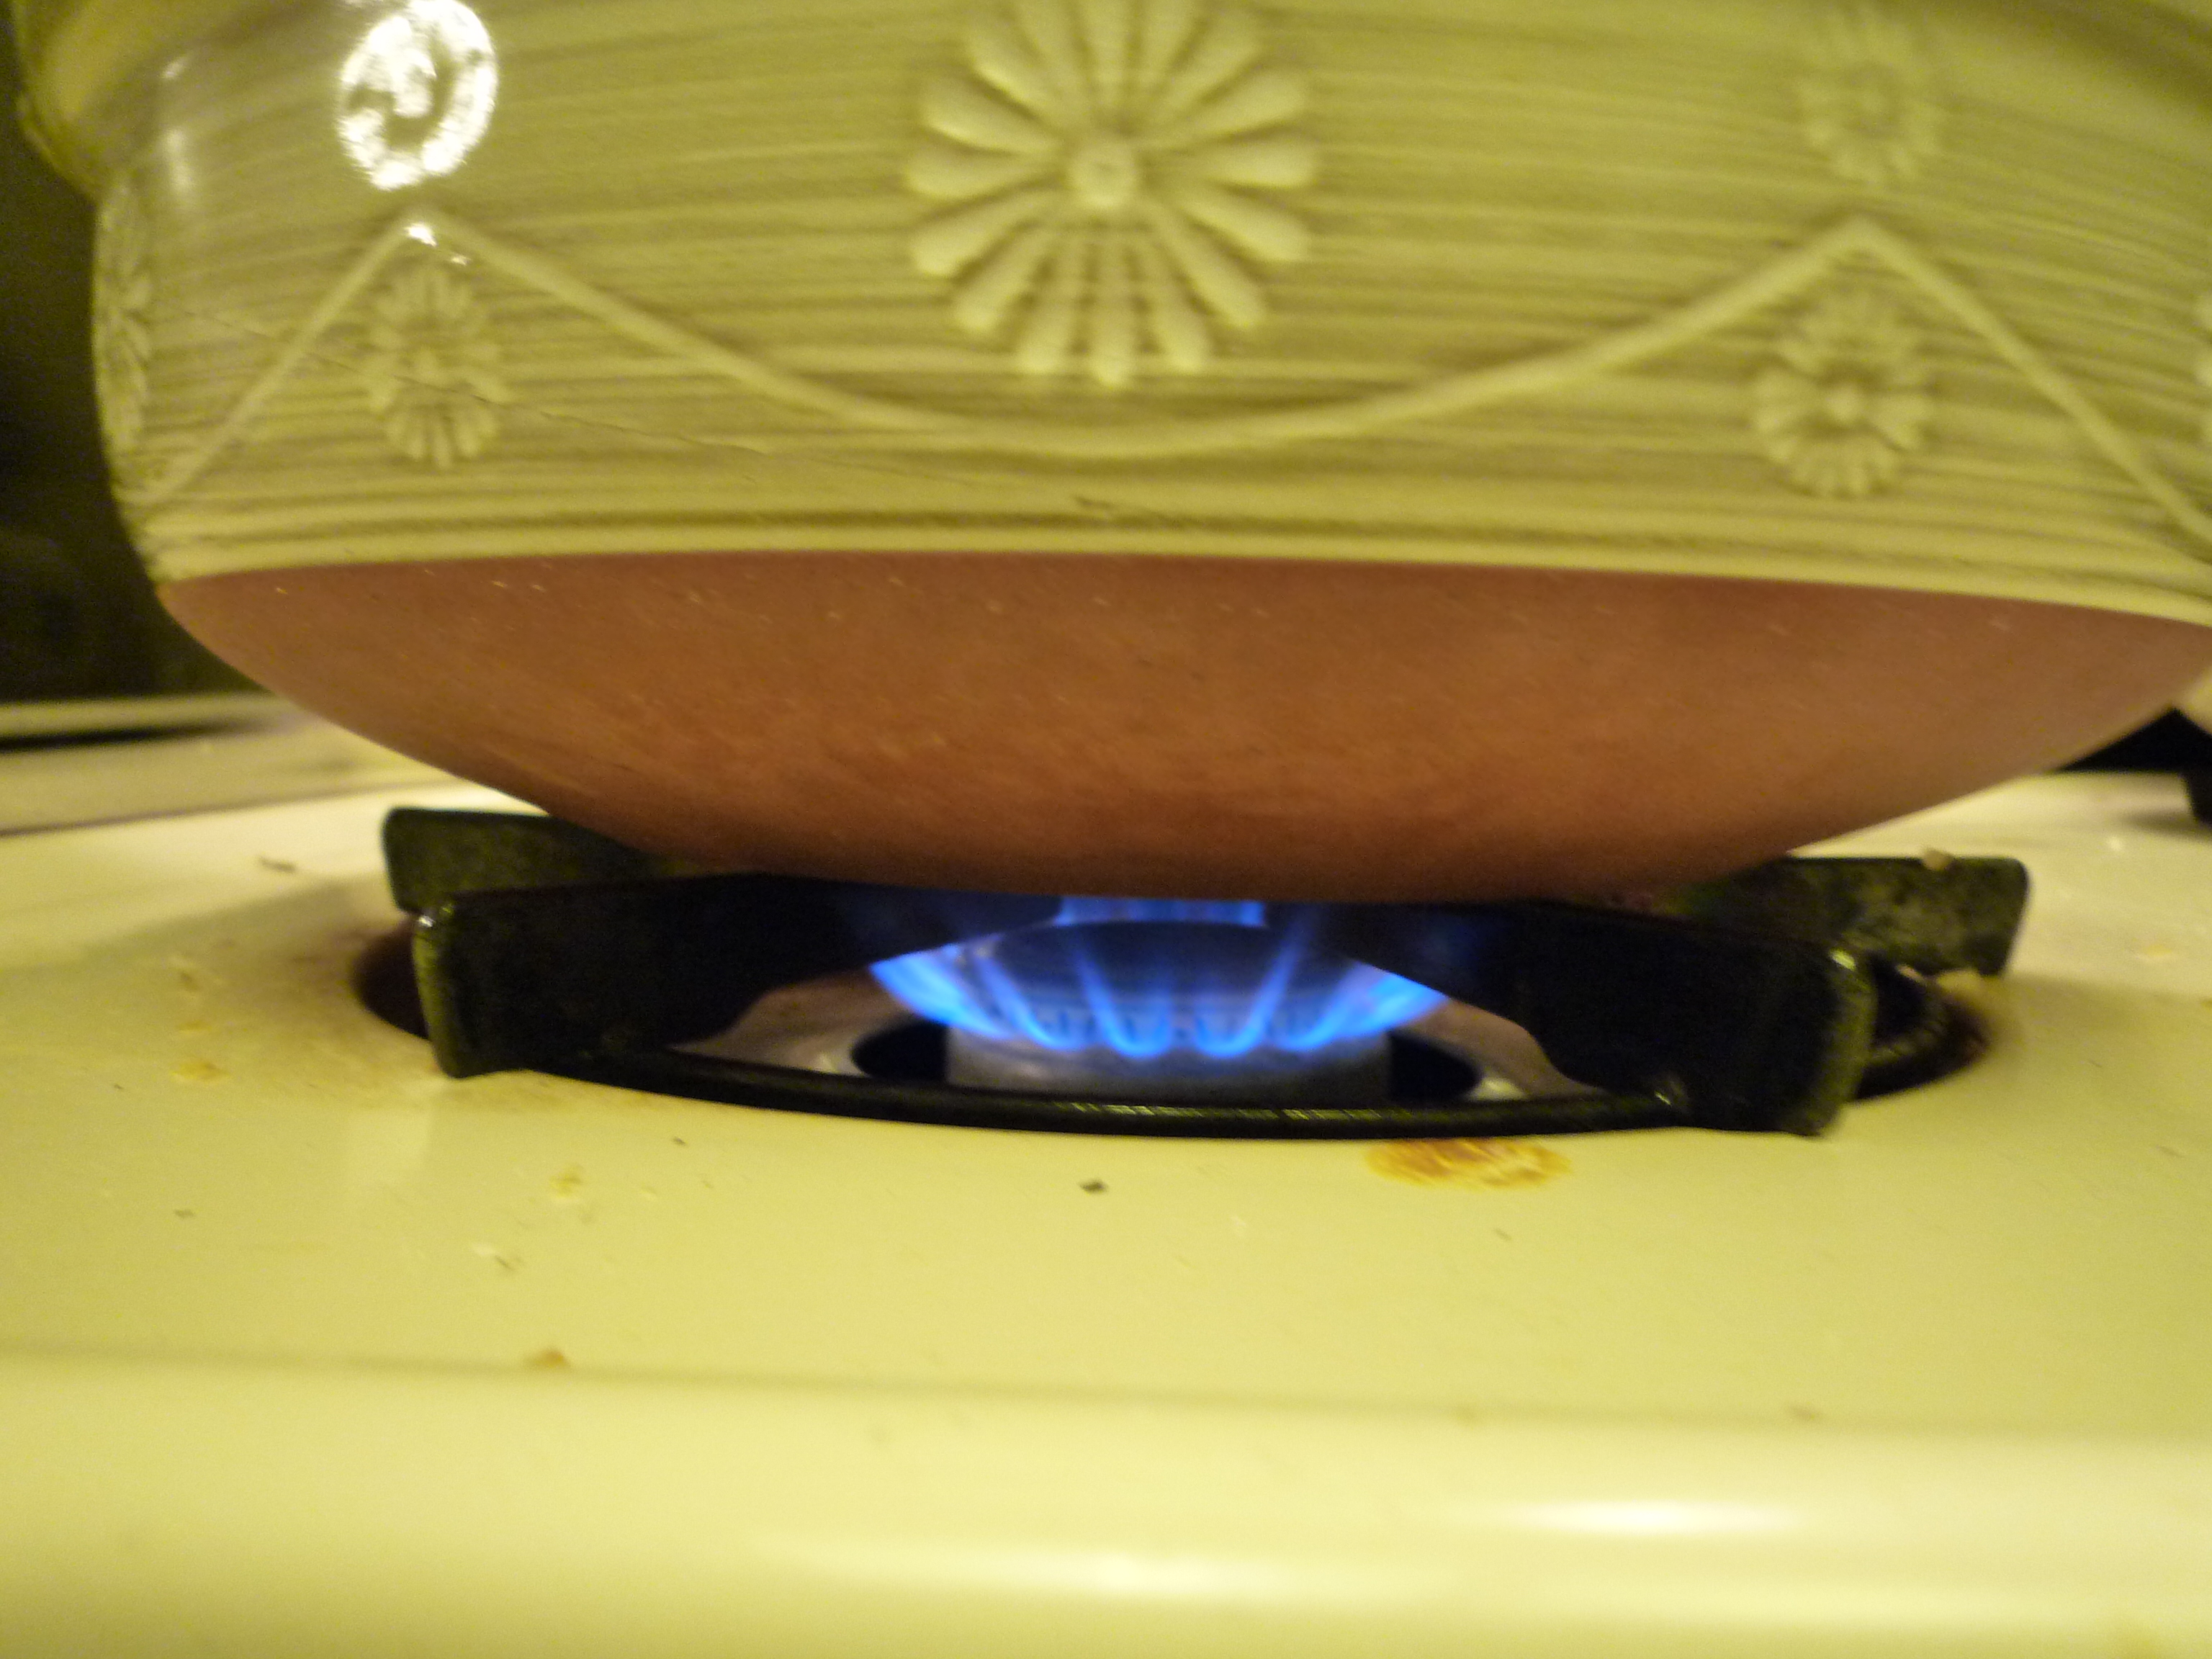
3) Turn on the stove on to medium heat and slowly bring to a boil. The rice should reach boiling at exactly the 10 minute mark.
4) Turn down the heat to low and simmer for 15 minutes.
5) Turn off the heat and steam for 10-15 minutes.
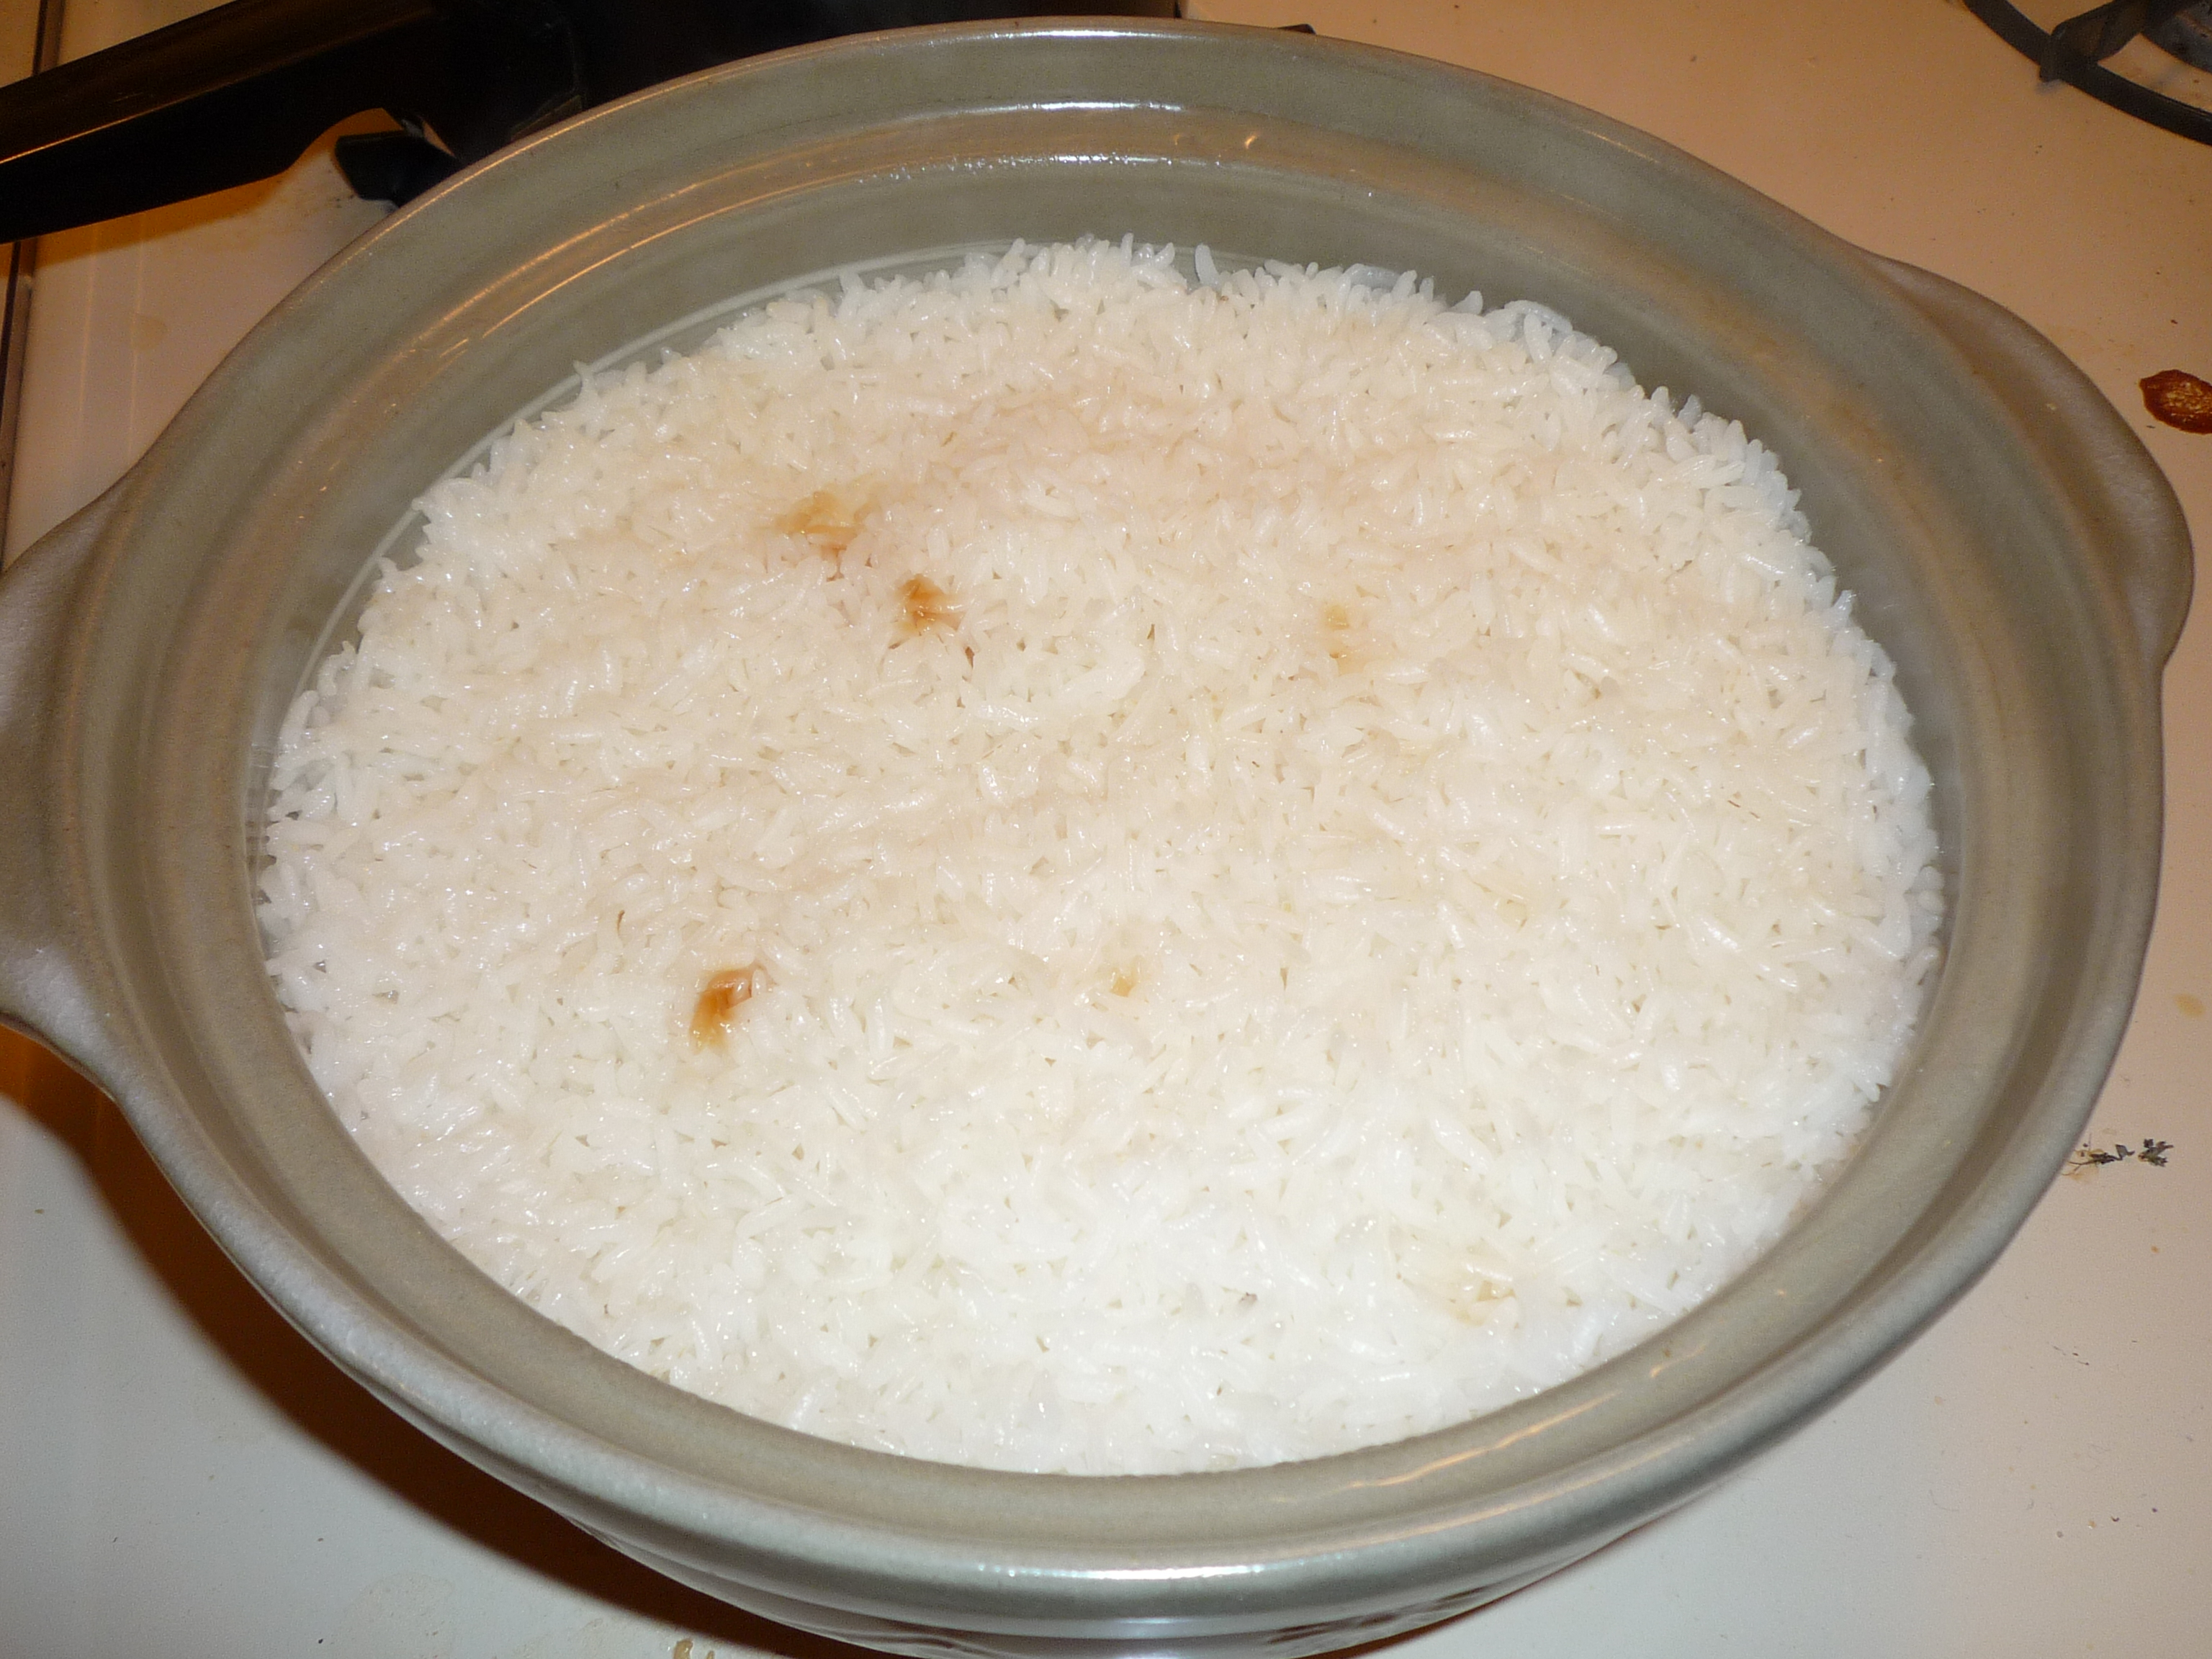
If you want to add okoge (crunchy toasted rice) to the bottom of the pot, you'll want to turn the heat up to high for 1 minute before you turn the stove off. **Tip: okoge is difficult to wash off your pot. I recommend soaking it and scraping off the top and then boiling it to loosen the burnt rice and then giving it a good scrub.
*The rice to water ratio is about 1:1.2 but since the rice absorbs some water when you wash it, it will end up being 1:1.
Easy Directions in a chart.

*Source: Tokyo Gas
This graph show how to optimize the taste.
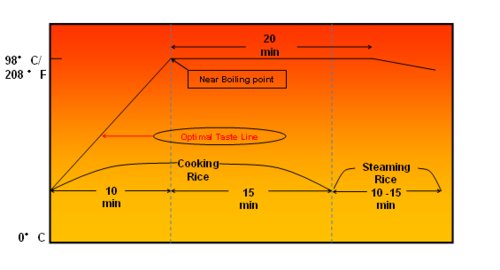
*Source: Tokyo Gas
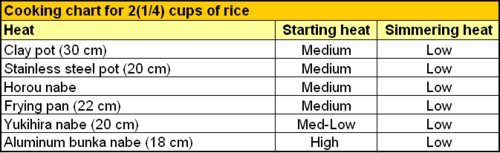
This chart lists the various options you have for cooking stove top rice. As you can see, the temperature is almost the same for most pots and pans. You'll want to start it at medium and then turn the heat to low but this will vary slightly depending on your particular pot.
*Source: Tokyo Gas
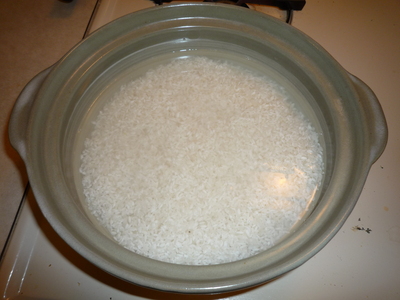
After washing rice, drain and immediately add to the pot and add water.
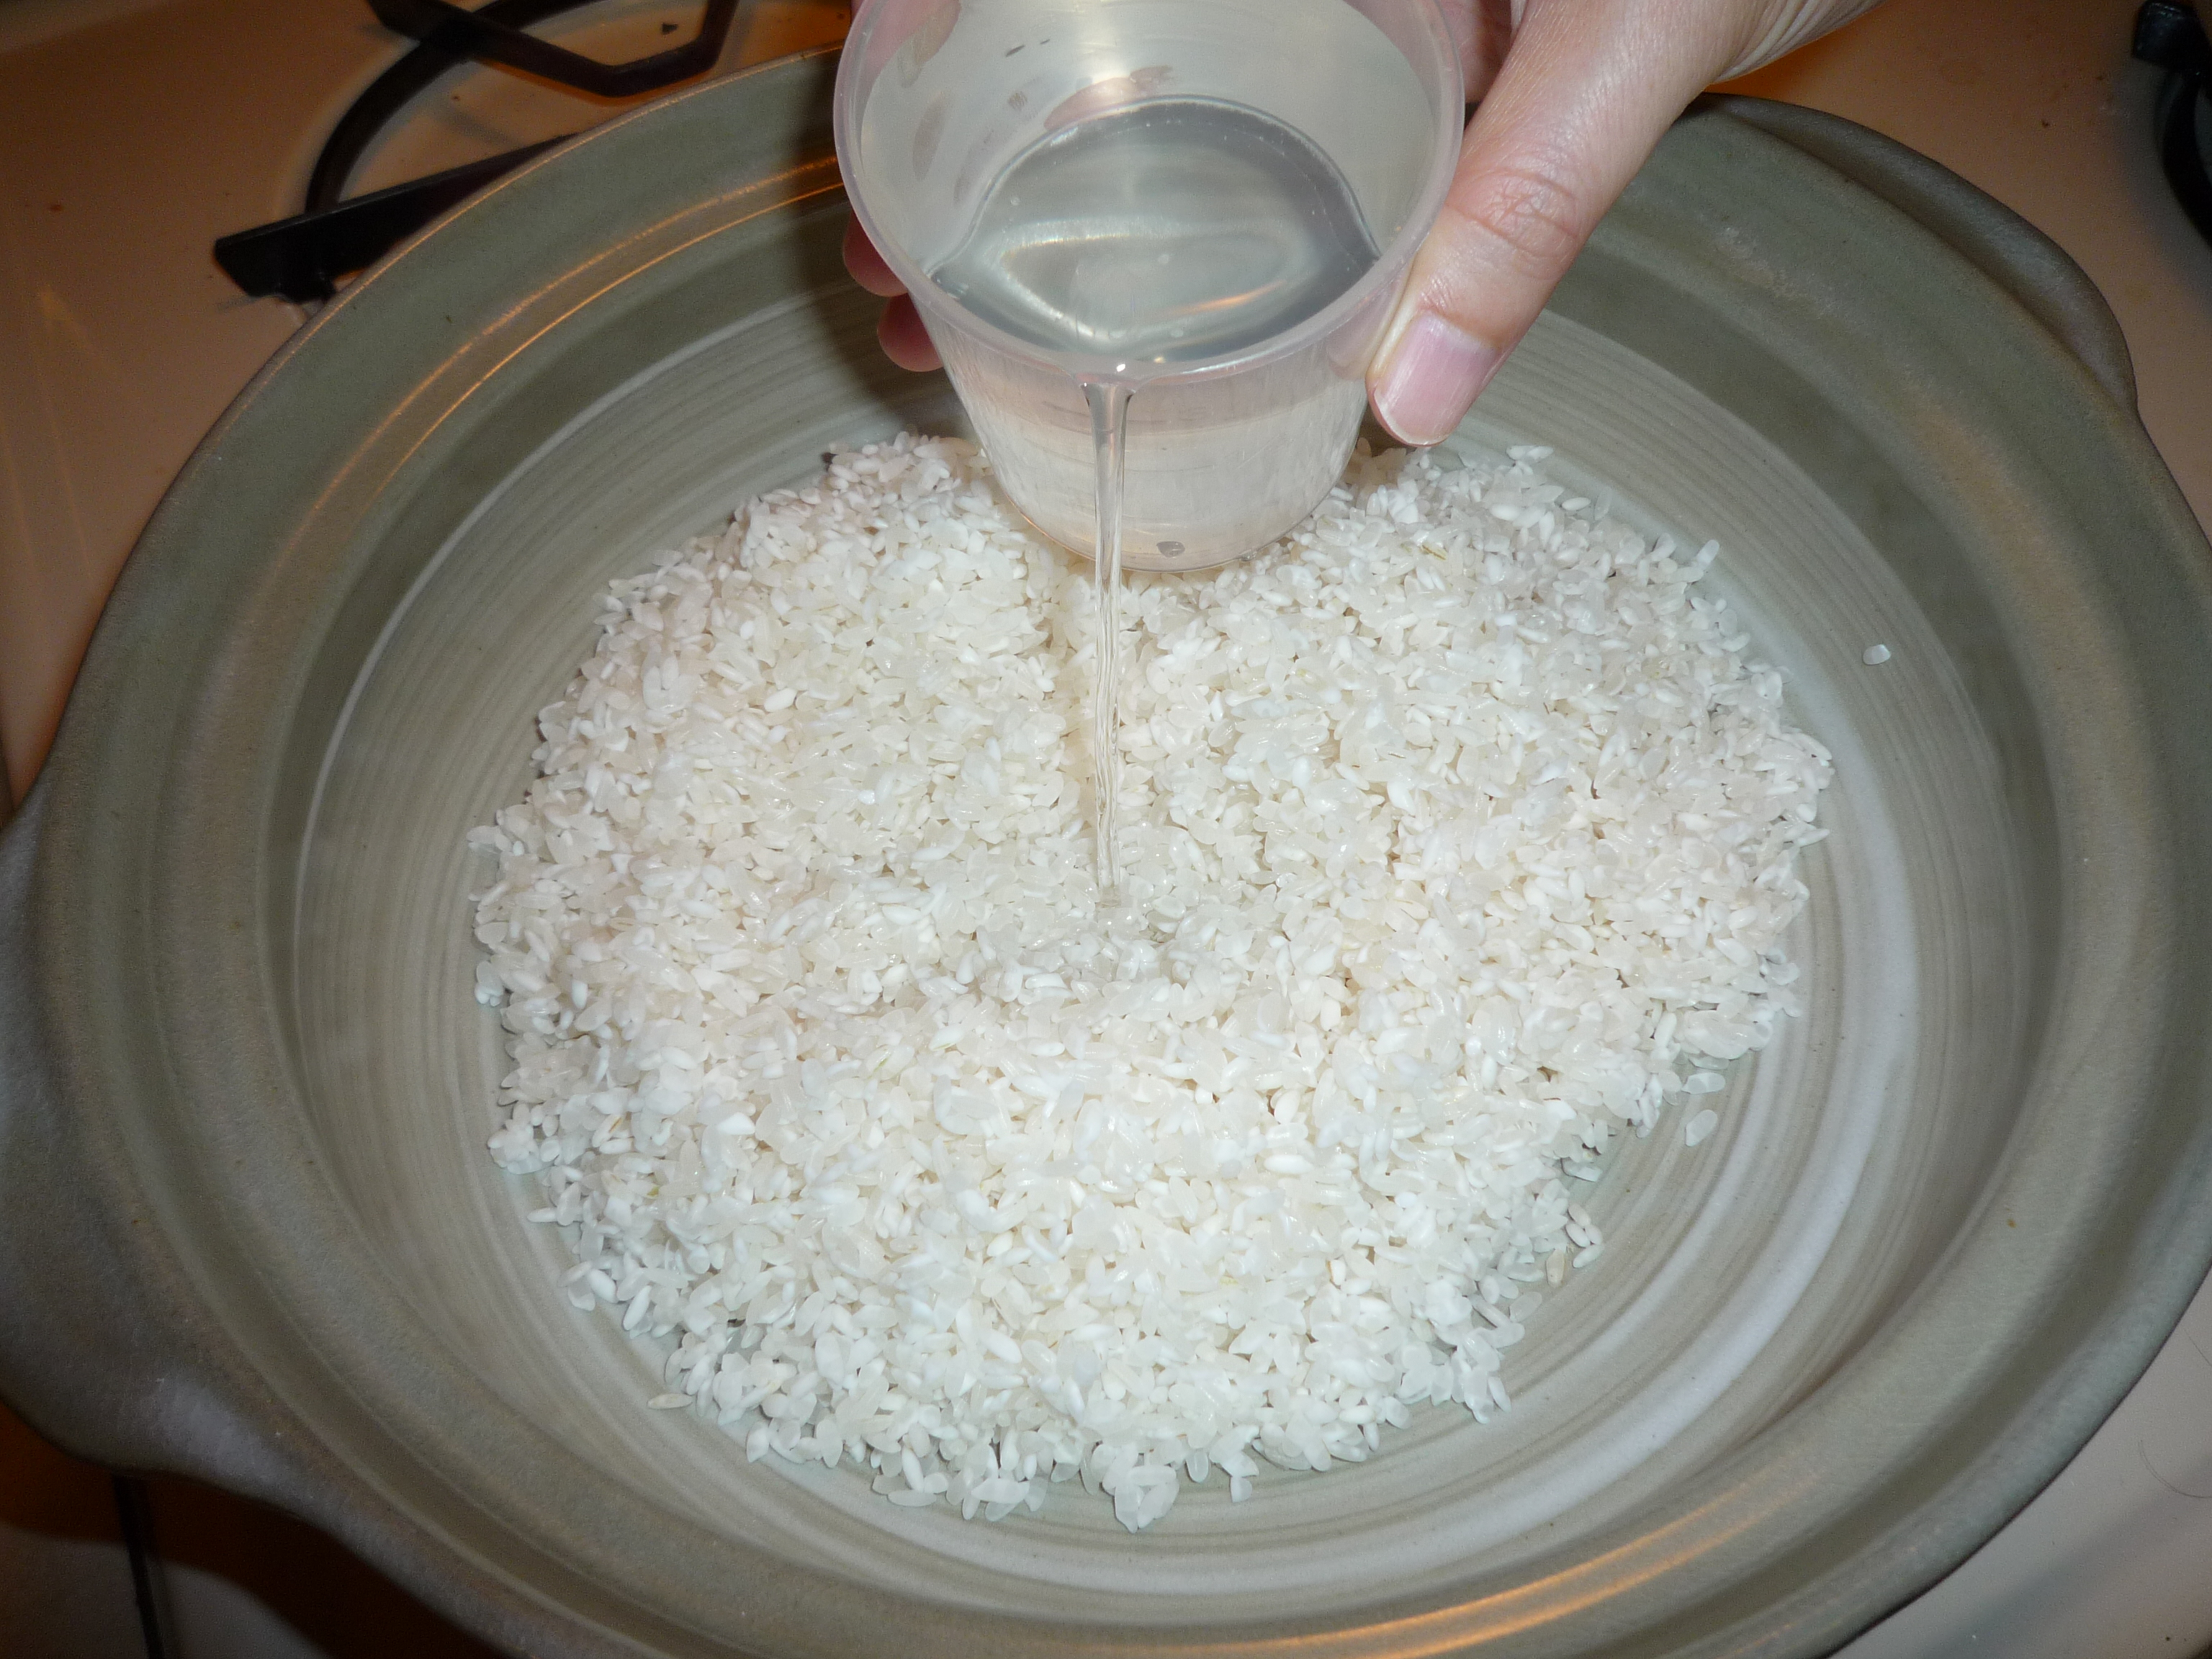
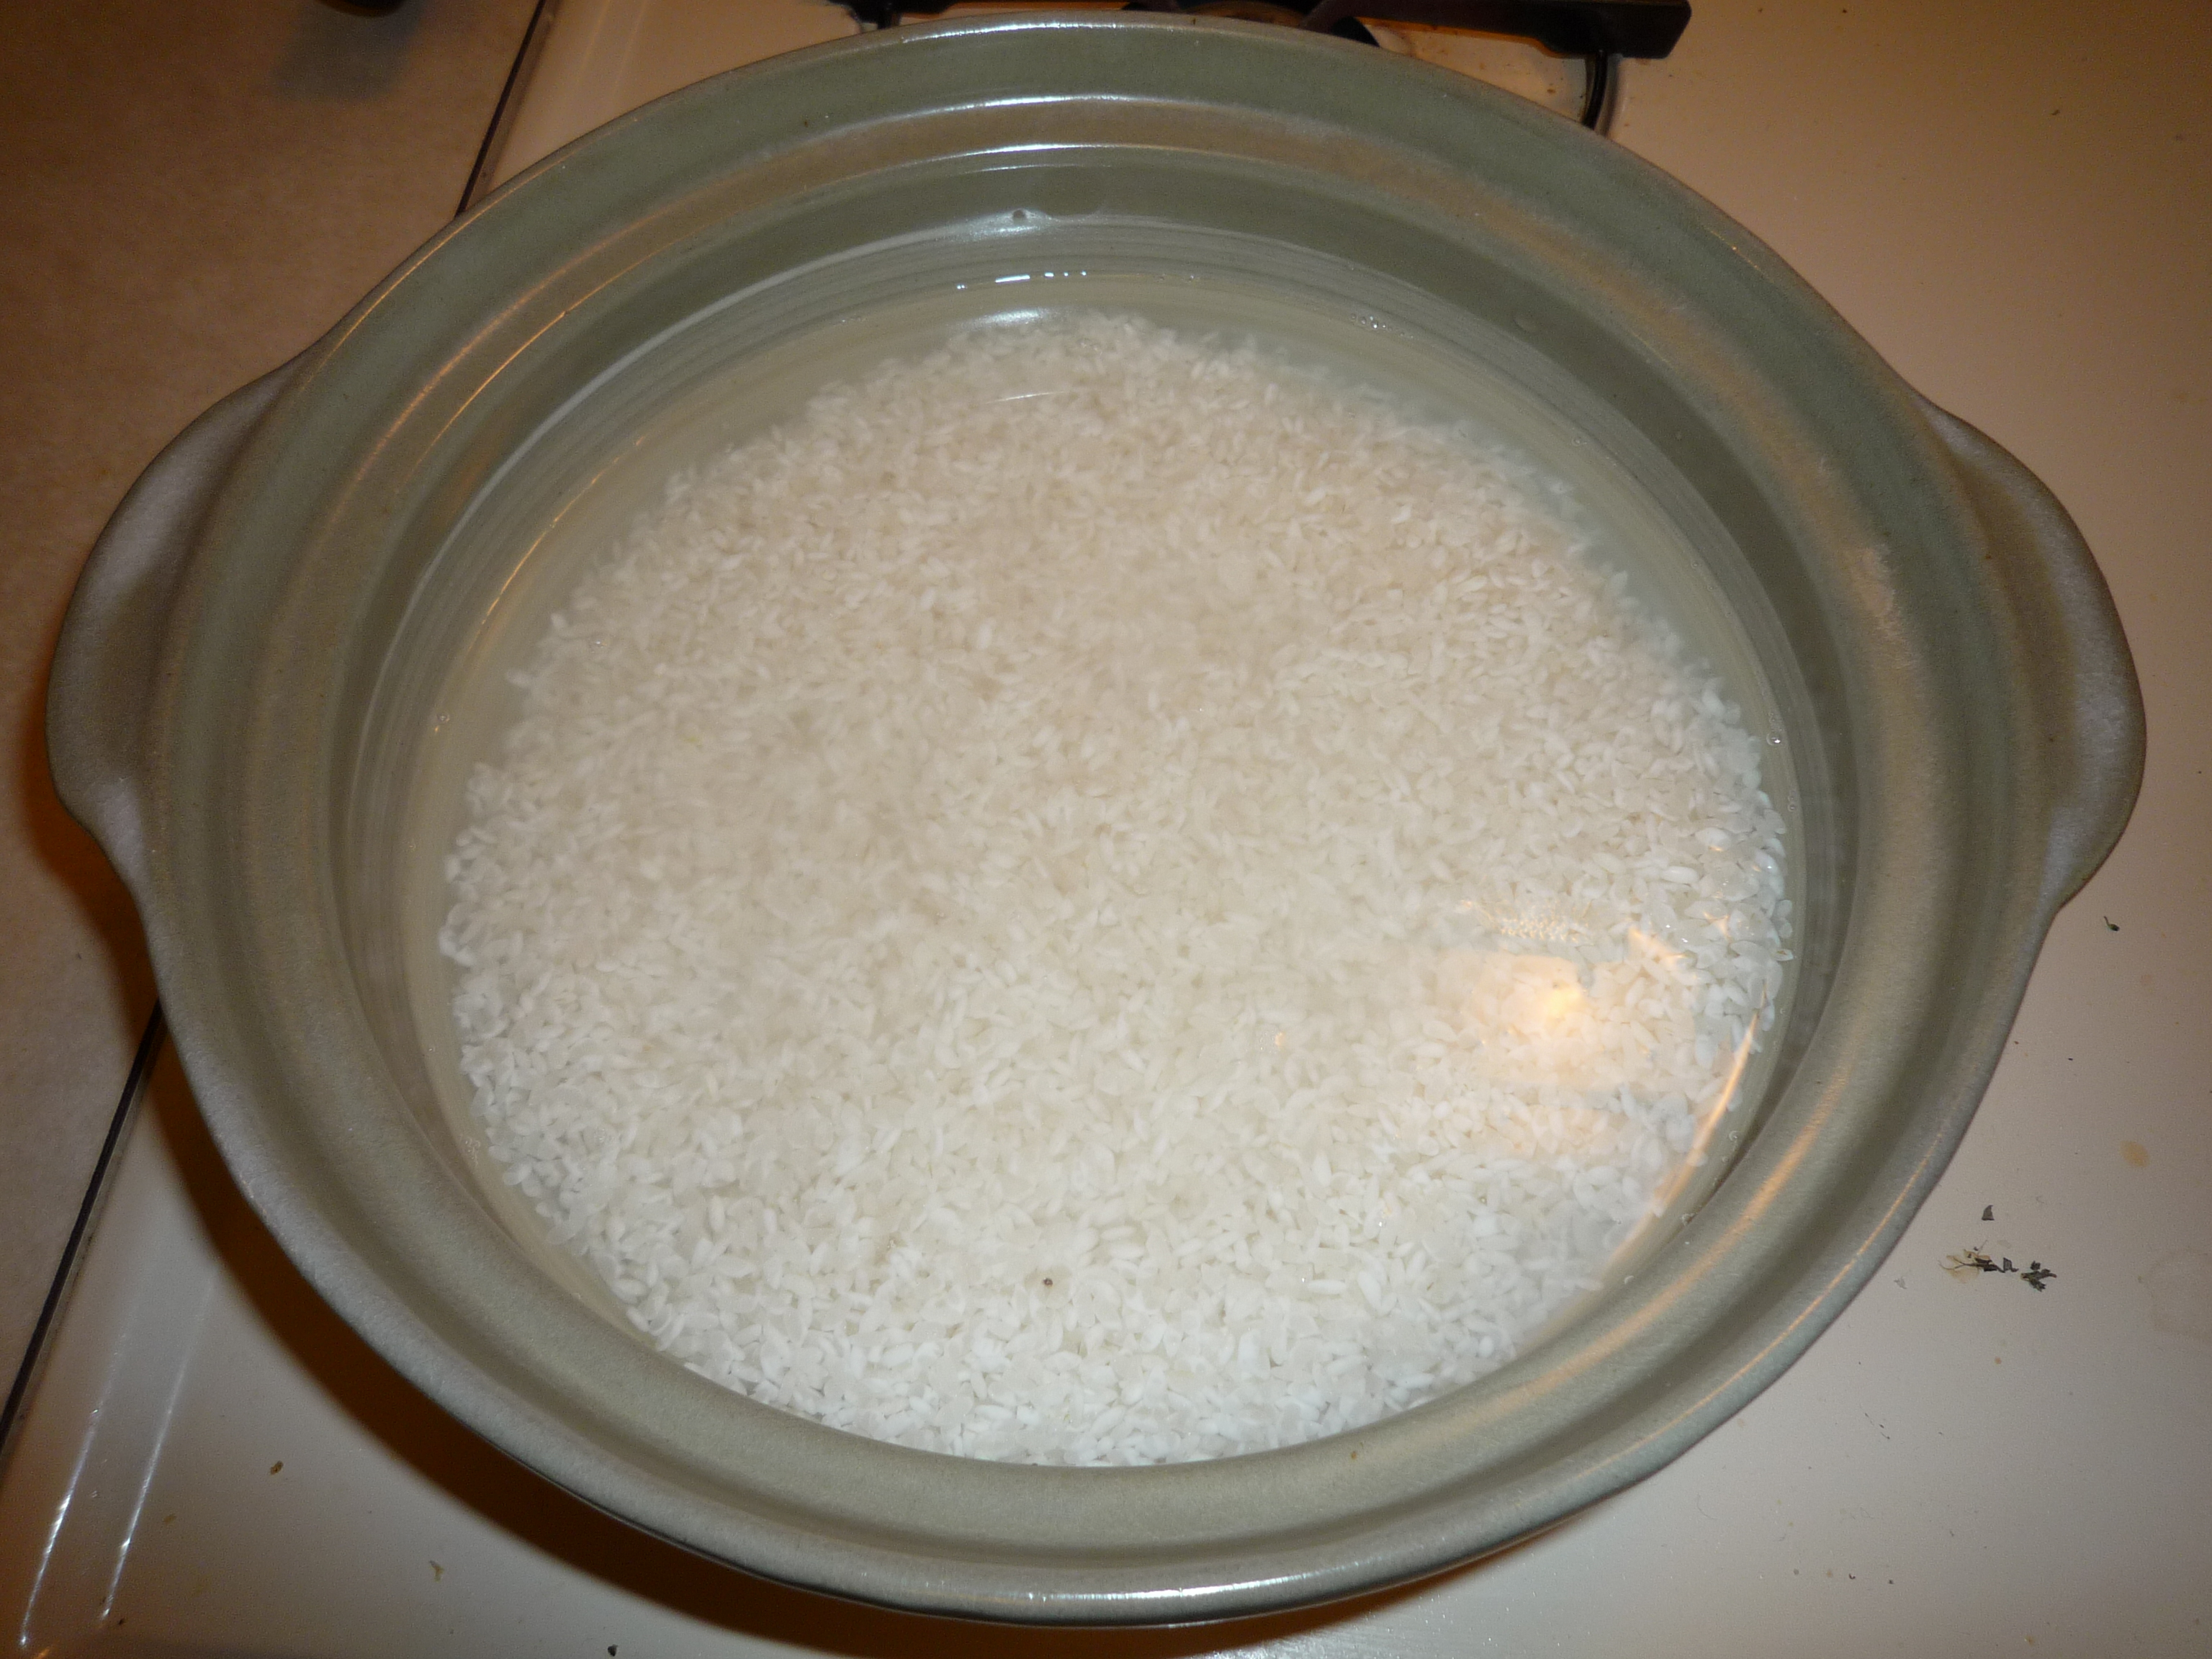
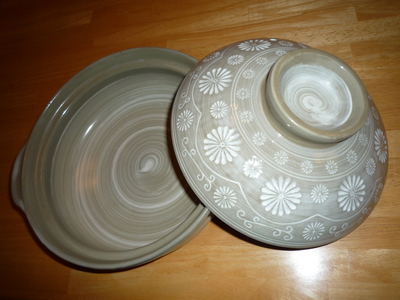
I used a clay pot.
Add purified water to the pot.

Soak the rice in the water for 30 minutes to an hour.
Make sure the heat is on low so that the rice doesn't dry out during step 4.

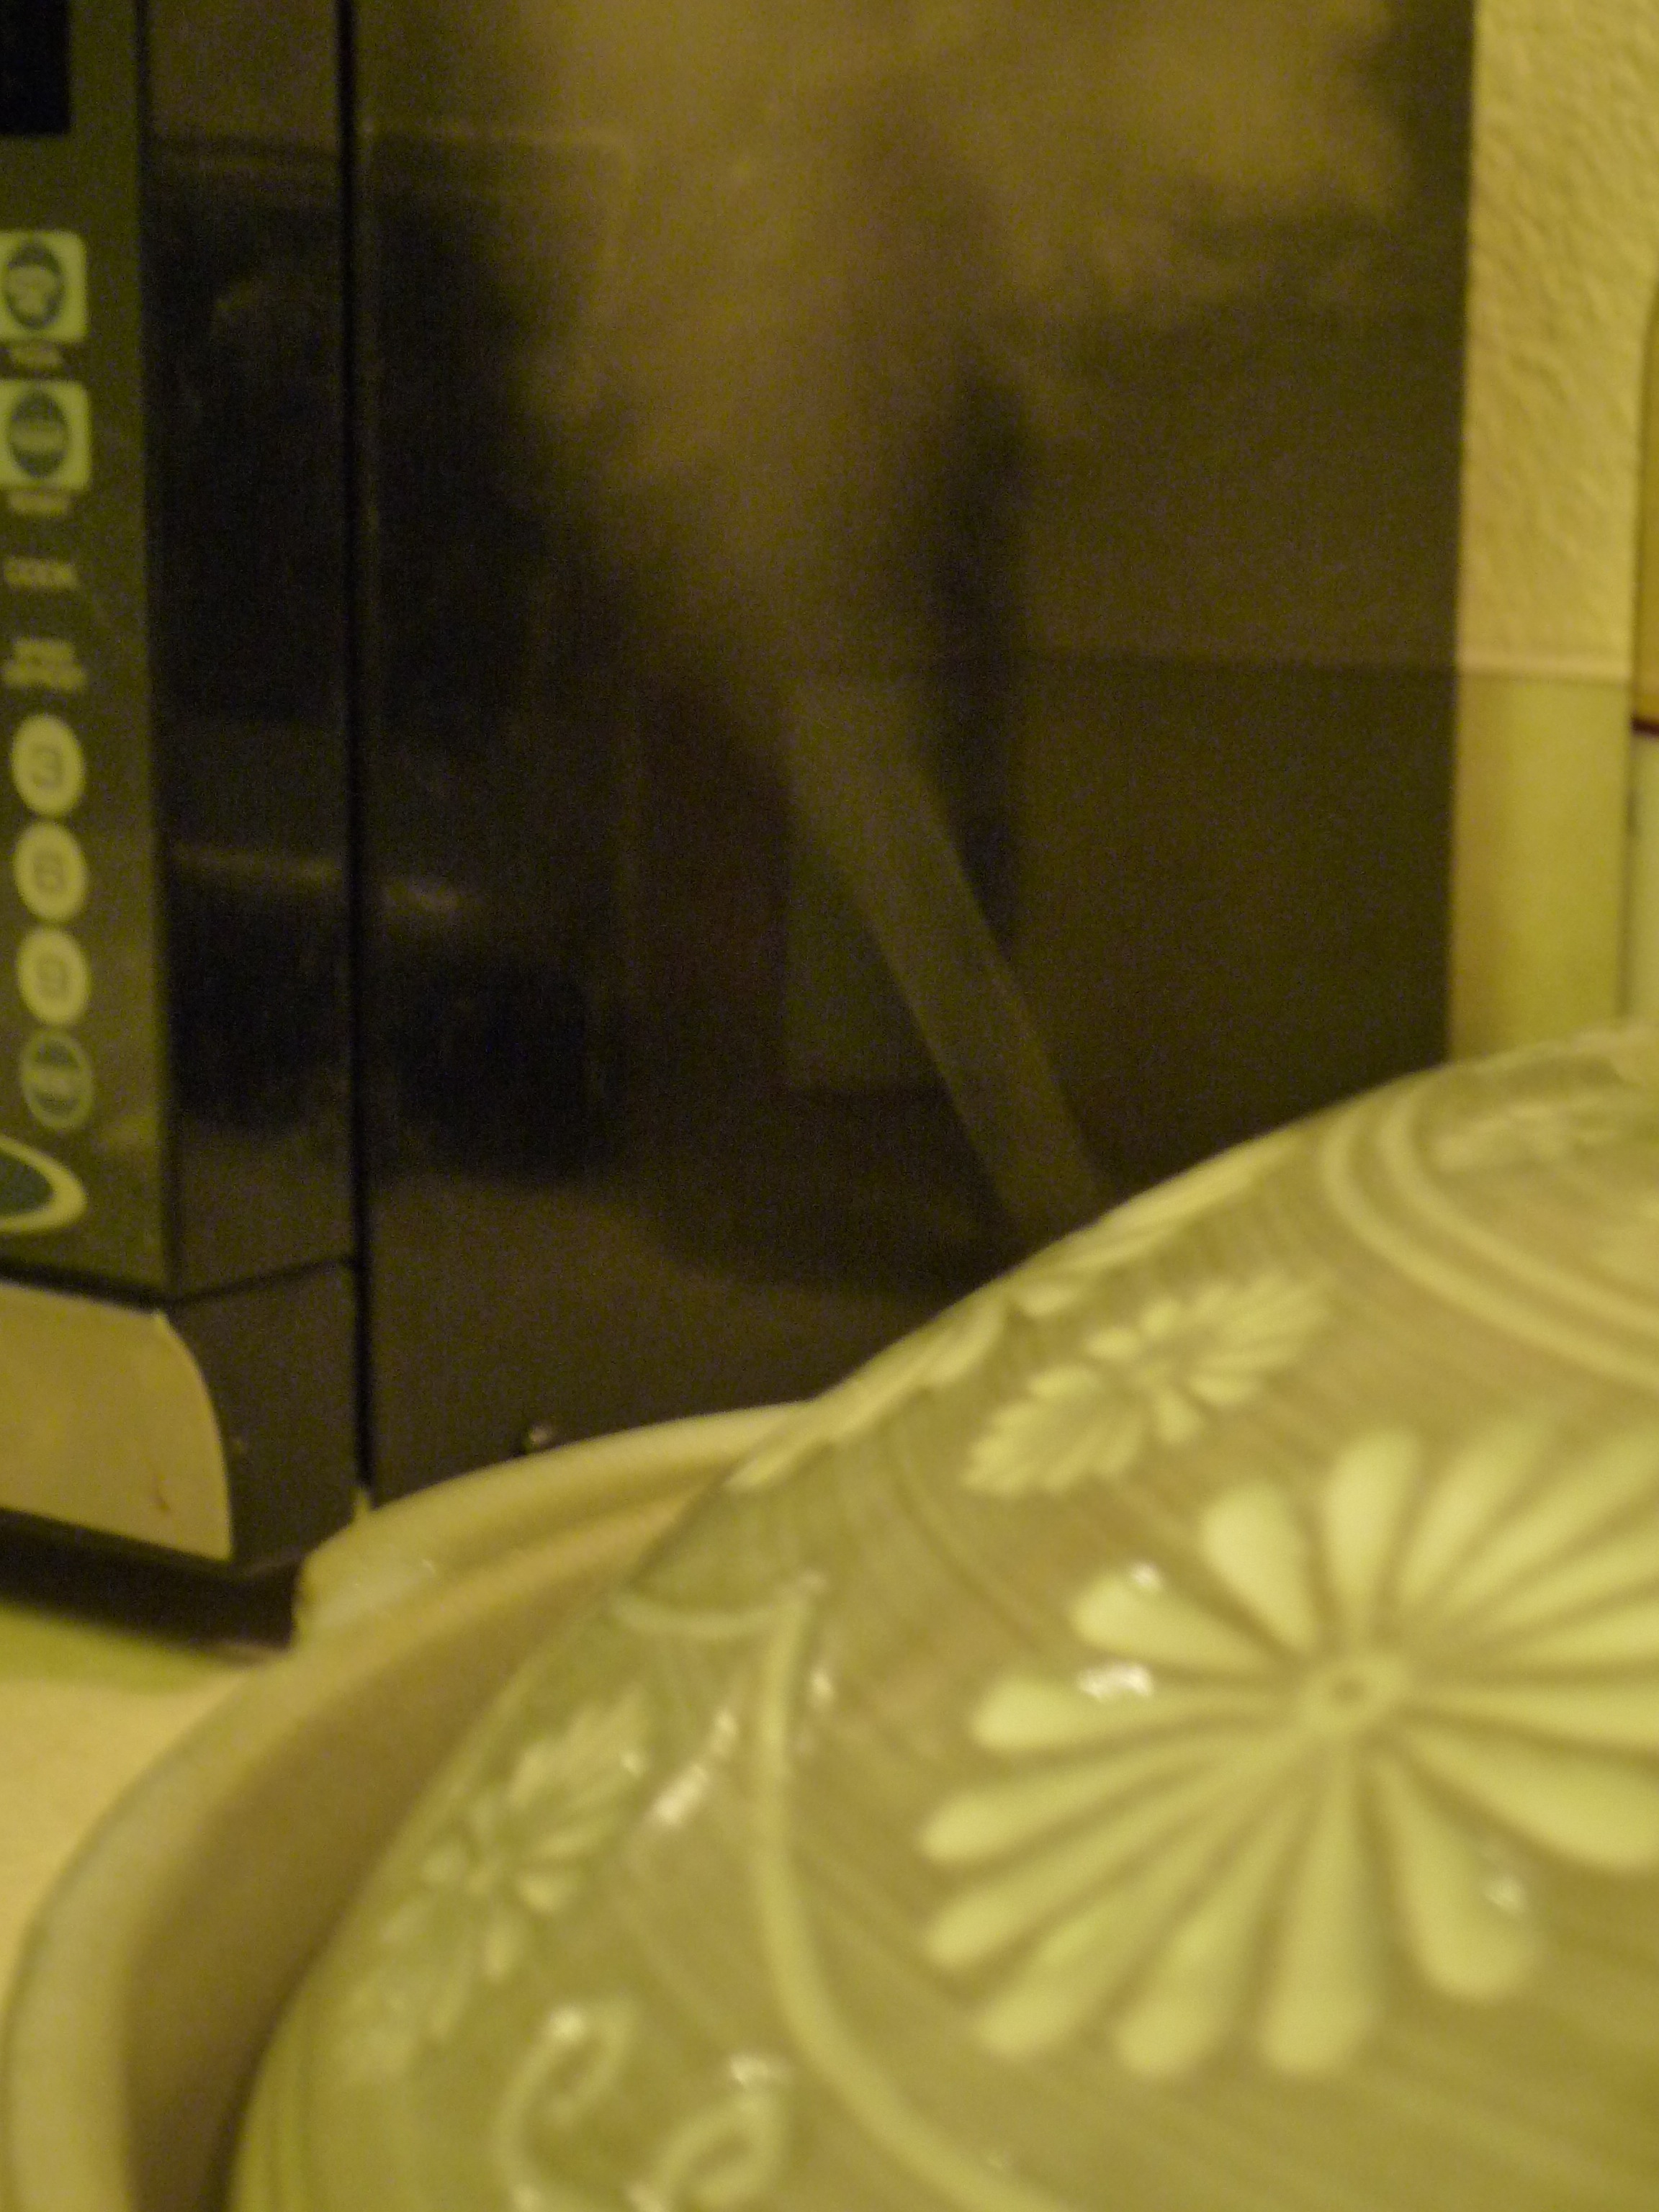
Close the hole with foil during the cooking stage. This will prevent the rice from becoming dry.
Pull out the foil during the last stage (the steaming stage) for fluffy rice. There shouldn't be this much steam coming out. This photo was taken during the cooking stage which releases too much steam.

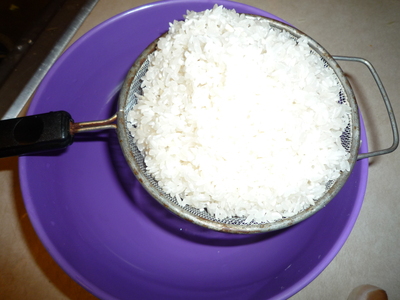
Fluffy fragrant rice. I added the okoge step.
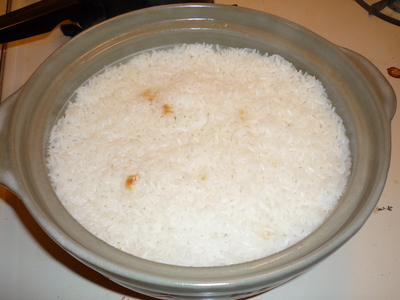
Mmmmm Okoge...tastes like senbei (Japanese rice cracker).